
A Car DVR 1080p is a high-definition digital video recorder designed for vehicles, offering crystal-clear footage at 1920×1080 resolution. It ensures sharp details, making it ideal for capturing road incidents, license plates, and driving scenarios. This device is essential for enhancing vehicle safety, providing evidence in case of accidents, and monitoring parking activities. With features like loop recording and emergency locking, it offers reliable continuous recording capabilities, ensuring peace of mind for drivers.
1.1 What is a Car DVR 1080p?
A Car DVR 1080p is a digital video recorder designed for vehicles, capturing high-definition footage at 1920×1080 resolution. It records road incidents, license plates, and driving environments with clarity. Featuring loop recording and emergency lock, it ensures continuous recording and saves critical moments. This device is a must-have for vehicle safety, providing reliable evidence and peace of mind for drivers on the road.
1.2 Importance of a Car DVR in Vehicle Safety
A Car DVR 1080p plays a crucial role in vehicle safety by providing high-quality evidence in case of accidents or incidents. It ensures continuous recording with loop functionality and emergency locking, capturing critical moments. Its parking mode and motion detection add an extra layer of security, while GPS and G-sensor features enhance safety by tracking location and detecting sudden movements, ensuring a secure driving experience.

Key Features of a 1080p Car DVR
A 1080p Car DVR offers high-definition video recording, ensuring clear footage of road incidents and license plates. It features wide dynamic range (WDR) for balanced lighting, loop recording for continuous capture, and an emergency lock to save critical moments. Built-in Wi-Fi enables smartphone connectivity, while GPS tracking and night vision enhance functionality and safety on the road.
2.1 High-Quality Video Recording (1920×1080 Resolution)
The Car DVR 1080p captures video at a resolution of 1920×1080 pixels, ensuring sharp and detailed footage. This high-definition recording capability allows users to clearly see license plates, road signs, and other critical details, even at a distance. The clear video quality is essential for providing accurate evidence in case of accidents or incidents on the road. This feature is a cornerstone of the device’s functionality.
2.2 Wide Dynamic Range (WDR) for Clear Footage
The Car DVR 1080p features Wide Dynamic Range (WDR), enhancing video clarity in varying light conditions. WDR balances bright and dark areas, ensuring details are visible even in challenging lighting, such as direct sunlight or nighttime driving. This technology minimizes overexposure and underexposure, delivering clear and usable footage for evidence or monitoring, making it a vital feature for accurate recording in all environments.
2.3 Loop Recording and Emergency Lock Features
Loop recording continuously captures footage, overwriting older files when storage is full, ensuring endless recording without manual intervention. The emergency lock feature saves critical clips from being overwritten during an incident. This ensures vital evidence is preserved, offering enhanced security and peace of mind for drivers in unexpected situations.
2.4 Built-in Wi-Fi for Smart Device Connectivity
Built-in Wi-Fi enables seamless connectivity between the DVR and your smartphone, allowing real-time video preview, file transfer, and app control. This feature simplifies accessing recordings, adjusting settings, and sharing clips without removing the SD card, enhancing user convenience and operational efficiency while on the go.
2.5 GPS and G-Sensor for Advanced Functionality
The GPS feature in the 1080p Car DVR enables precise location tracking, speed monitoring, and route logging, while the G-Sensor detects sudden movements or impacts, automatically locking important footage. These advanced functionalities enhance safety by providing accurate data for potential incidents and ensuring critical evidence is preserved, making the DVR a robust tool for drivers seeking comprehensive protection and monitoring capabilities.
Installation and Setup
Mount the DVR on the windshield, connect power, and sync with rear and cabin cameras. Ensure proper wiring and alignment for optimal performance and clear visibility.
3.1 Mounting the DVR on the Windshield
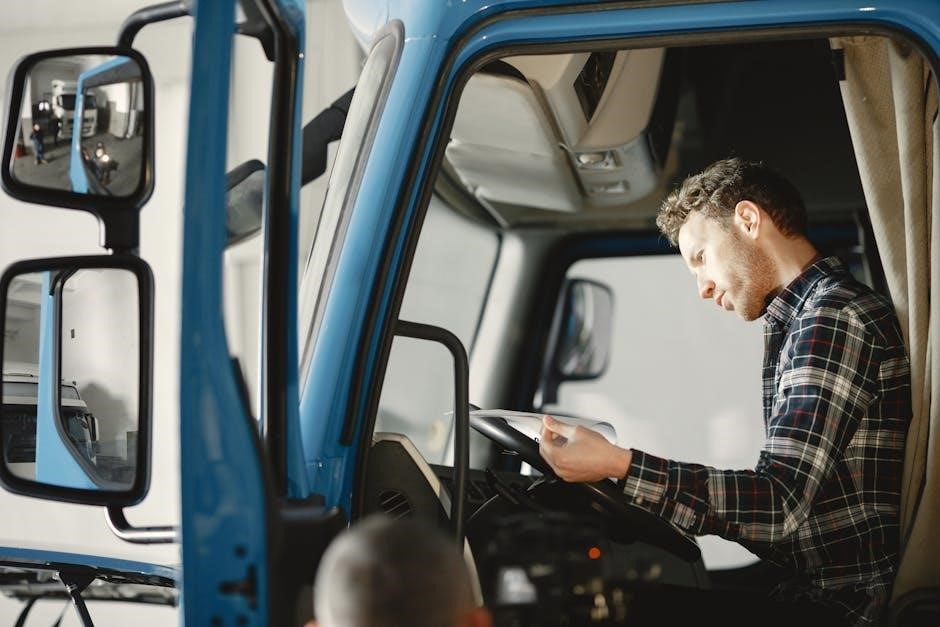
Position the DVR in the center of the windshield, ideally behind the rearview mirror, to avoid obstructing the driver’s view. Use the provided adhesive mount or suction cup for secure installation. Ensure the device is level and adjust as needed for optimal recording angle. Clean the windshield surface beforehand for a strong bond. Use cable management tools to neatly route wires for a tidy setup.
3.2 Connecting Power and Wiring
Connect the DVR to your vehicle’s power supply using the provided USB cable or hardwire kit. Plug the cable into the cigarette lighter adapter or directly to the car’s fuse box for constant power. Ensure all wires are securely connected and routed neatly using cable management tools. Avoid loose connections to prevent power interruptions. Check the voltage requirements to match your vehicle’s electrical system for safe operation.
3;4 Syncing with Rear and Cabin Cameras
To sync rear and cabin cameras with your DVR, connect the AV cables from the cameras to the designated ports on the DVR. Ensure the DVR is powered on and navigate to the menu to enable the rear and cabin camera options. Select the correct video input sources and adjust settings as needed. Test the connection to confirm both cameras are syncing and recording properly. If issues arise, refer to the user manual for troubleshooting steps.

Operating the DVR
Power on the DVR using the Power button and navigate through the menu using the R, OK, and Lock buttons. Start or stop recording with the OK button and lock important clips with the Lock button. Use the menu to review settings and ensure smooth operation. Refer to the manual for detailed instructions on button functions and recording controls.
4.1 Powering On and Navigating the Menu
Press the Power button to turn on the DVR. Use the R button to scroll through menu options and the OK button to select. The Lock button saves clips. Access settings like resolution, loop recording, and parking mode through the menu. Navigate back using the R button. Ensure the device is properly connected to power for continuous operation during drives.
4.2 Starting and Stopping Recordings
Press the OK button to start recording. The DVR will begin capturing footage immediately. To stop recording, press the OK button again. The device also features auto-start, beginning recording when power is applied. For manual control, use the OK button to pause or resume recording at any time during your drive.
4.3 Using the Emergency Lock Button
The Emergency Lock Button ensures crucial moments are preserved. Press it during recording to save the current clip, preventing it from being overwritten by loop recording. This feature is ideal for capturing unexpected events. The DVR continues recording uninterrupted, only protecting the locked file from deletion. Regularly review and manage locked files to maintain sufficient memory capacity for ongoing recordings.

Recording Settings and Customization
Customize your DVR settings to optimize video quality and storage. Adjust resolution up to 1080p, enable loop recording, and set time-lapse intervals for efficient recording management;
5.1 Adjusting Video Resolution and Frame Rate
Adjust video resolution to 1080p, 720p, or lower for optimal clarity. Frame rates like 30FPS ensure smooth recording. Access settings via the menu, using OK and R buttons. Select preferred resolution and frame rate to balance quality and storage needs. The manual provides guidance for customization based on your preferences and storage capacity requirements.
5.2 Enabling Loop Recording and Overwrite Options
Enable loop recording to automatically overwrite old files when storage is full. Set intervals (1, 2, 3, or 5 minutes) via the menu. Overwrite options allow the device to delete oldest files first. Use the emergency lock button to protect important clips from being overwritten. This feature ensures continuous recording without manual intervention, optimizing storage efficiently while preserving critical footage. Adjust settings as needed for your recording preferences.
5.3 Setting Up Time-Lapse and Parking Mode
Enable time-lapse recording to condense footage into shorter videos, reducing storage usage. Parking mode activates recording when motion or impact is detected, providing 24/7 monitoring. Access these settings via the menu, selecting time-lapse intervals and parking mode activation. Ensure the G-Sensor is enabled for motion detection. These features enhance security and efficiency, offering peace of mind while your vehicle is stationary.

Special Features and Functionality
The Car DVR 1080p offers advanced features such as night vision, parking monitor, and GPS tracking, enhancing functionality and providing added security for drivers daily.
6.1 Night Vision and Low-Light Performance
The Car DVR 1080p excels in low-light conditions, utilizing night vision technology to capture clear footage even in dimly lit environments. This feature ensures that details like license plates and road obstacles remain visible, enhancing safety and evidence quality during nighttime driving or in areas with poor lighting. The enhanced sensor and WDR technology contribute to superior low-light performance.
6.2 Parking Monitor and Motion Detection
The Car DVR 1080p features a Parking Monitor that activates recording when motion is detected or impact is sensed while the vehicle is parked. This ensures your car is protected even when unattended, capturing potential vandalism or collisions. The motion detection function adds an extra layer of security, providing peace of mind and reliable evidence in case of incidents occurring in your absence.
6.3 GPS Tracking and Speed Camera Alerts
The Car DVR 1080p includes GPS tracking, enabling precise location monitoring and speed tracking. It alerts drivers to speed cameras and traffic enforcement zones, promoting safe driving practices. The GPS data can be reviewed for route analysis or driving behavior assessment, enhancing overall vehicle safety and compliance with traffic regulations while on the road.
Connectivity and App Integration
The Car DVR 1080p connects to smartphones via Wi-Fi, enabling live view, file downloads, and settings adjustments through a dedicated app. GPS tracking and real-time alerts enhance functionality.
7.1 Connecting the DVR to Your Smartphone
Connect your Car DVR 1080p to your smartphone via Wi-Fi by enabling the DVR’s Wi-Fi feature and selecting its network on your phone. Open the dedicated app, follow in-app pairing instructions to link the devices, and ensure both are powered on. If issues arise, restart both devices or check for firmware updates to ensure compatibility and smooth connectivity.
7.2 Viewing and Downloading Recordings via Wi-Fi
Access your DVR recordings by connecting to its Wi-Fi network via the smartphone app. Once connected, browse and select desired clips to download directly to your device. Ensure sufficient storage space on your phone before transferring. Videos are typically stored on the DVR’s SD card, allowing easy transfer and backup for later viewing or sharing.
7.4 Firmware Updates and Maintenance
Regular firmware updates are essential for optimal DVR performance. Use the smartphone app to check for and install updates via Wi-Fi. Ensure the device is connected to a stable network during the update process. Periodically download and install new firmware to enhance functionality, fix bugs, and improve overall device performance. Always follow the manufacturer’s instructions for a smooth update process.
Troubleshooting Common Issues
This section addresses common issues with your Car DVR, such as video retrieval problems and connectivity errors, helping you resolve them efficiently for optimal performance.
8.1 No Video Found for Cabin and Rear Cameras
If your cabin or rear cameras aren’t recording video, ensure all connections are secure and properly plugged in. Check the DVR settings to confirm rear and cabin cameras are enabled. Verify that the SD card is compatible and has sufficient storage. If issues persist, restart the DVR or consult the user manual for further troubleshooting steps to resolve the problem effectively.
8.2 Wi-Fi Connectivity Problems
To resolve Wi-Fi connectivity issues, restart the DVR and ensure it is in Wi-Fi mode. Check the password and network name, and confirm your smartphone is connected to the correct network. If issues persist, reset the DVR to factory settings or consult the user manual for advanced troubleshooting steps to restore connectivity and ensure proper functionality.
8.3 Loop Recording and File Overwrite Issues
If loop recording isn’t functioning or files are being overwritten unexpectedly, check the SD card’s compatibility and capacity. Ensure the card is properly formatted and has sufficient space. Verify loop recording settings in the menu, enabling the overwrite option if necessary. If issues persist, format the SD card or reset the DVR to factory settings to restore proper functionality.

Tips for Getting the Most Out of Your Car DVR
- Choose a high-endurance SD card designed for dash cams to ensure reliable recording.
- Position the camera centrally on the windshield for optimal coverage and minimal distraction.
- Regularly update firmware and format the SD card to maintain peak performance.
9.1 Choosing the Right SD Card for Dash Cams
Selecting the right SD card is crucial for optimal performance. Opt for high-endurance cards specifically designed for dash cams, as they withstand frequent write/delete cycles. Ensure the card capacity aligns with your DVR’s specifications for continuous loop recording. Regularly format the SD card via the DVR’s settings to maintain performance and prevent errors. This ensures reliable video storage and playback.
9.2 Positioning the Camera for Optimal Coverage
Mount the dash cam centrally on the windshield, behind the rearview mirror, for unobstructed road views. Adjust the angle to cover the entire front and minimize glare. Ensure it doesn’t obstruct the driver’s vision. For dual or cabin cameras, position rear units to capture the back seat or cargo area, and align cabin cameras to monitor interior activities without invading privacy.
9.3 Regularly Updating and Maintaining the Device
Regularly check for firmware updates to ensure optimal performance and access new features. Use high-endurance SD cards designed for dash cams to prevent data corruption. Clean the camera lens and screen to maintain video clarity. Periodically review and delete unnecessary recordings to free up storage space, ensuring smooth loop recording functionality.
A Car DVR 1080p is an indispensable tool for modern drivers, offering high-quality video recording, advanced safety features, and ease of use. Regular updates and proper maintenance ensure optimal performance. By following this guide, you can maximize your DVR’s potential, enhancing safety and peace of mind on the road. Invest in a reliable DVR to protect your vehicle and capture every journey with clarity.