
Nikon Coolpix Instruction Manual: A Comprehensive Guide
Welcome! This detailed manual empowers you to confidently explore and master your Nikon Coolpix camera, ensuring optimal performance and stunning imagery.
The Nikon Coolpix series represents a long-standing tradition of user-friendly, high-quality digital cameras. Designed for both beginners and enthusiasts, these cameras bridge the gap between smartphone photography and more complex DSLR systems. Coolpix models prioritize portability and ease of use, offering a diverse range of features within a compact body.
From automatic modes for effortless shooting to customizable settings for creative control, the Coolpix series caters to various skill levels. This manual will guide you through unlocking the full potential of your specific Coolpix model, ensuring memorable photos and videos.
Understanding Your Coolpix Model
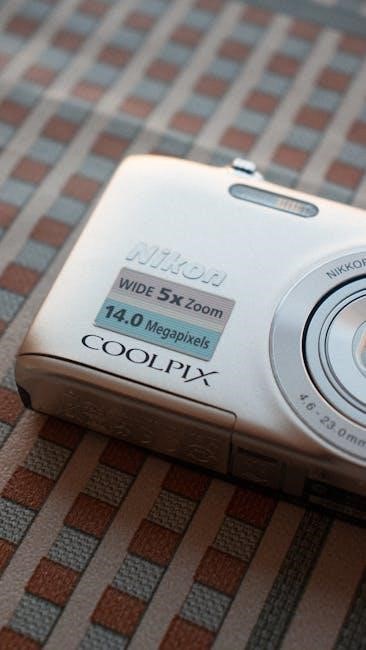
Each Nikon Coolpix model boasts unique features and specifications. Familiarize yourself with the physical components: lens, shutter button, mode dial, LCD screen, and control buttons. Explore the camera’s capabilities – megapixel count, zoom range, and available shooting modes.
Refer to the specific model number (e.g., Coolpix A1000, B500) for detailed information regarding its particular functions. Knowing these details will significantly enhance your photographic experience and allow for optimal utilization of its features.
Initial Setup and Preparation
Before embarking on your photographic journey, proper setup is crucial. Begin by inserting the provided battery into the designated compartment, ensuring correct polarity. Next, locate the memory card slot and gently insert a compatible SD card.
Power on the camera and follow the on-screen prompts to set the date, time, and preferred language. These initial steps will personalize your Coolpix and prepare it for capturing memorable moments with ease and precision.
Charging the Battery
To ensure optimal performance, fully charge the battery before initial use. Connect the provided AC adapter to the camera and a wall outlet. The charging indicator light will illuminate, typically displaying red during charging and green when complete.
Avoid interrupting the charging process. A full charge typically takes several hours. Disconnect the adapter once charging is finished to preserve battery life and prevent overcharging.
Inserting the Memory Card
Locate the memory card slot, usually found on the side or bottom of the camera. Gently insert the compatible memory card (SD, SDHC, or SDXC) into the slot, ensuring it clicks securely into place. Do not force the card.
To remove the card, gently press it inwards to release the locking mechanism, then carefully pull it out. Always handle the card with care to avoid damage or data loss.
Basic Camera Operations

Familiarizing yourself with core functions is key to enjoying your Nikon Coolpix. This section covers powering the camera on and off, selecting shooting modes – from Auto for simplicity to more creative options.
We’ll also guide you through navigating the menu system, accessing settings for image quality, flash, and other essential features. Mastering these basics unlocks the full potential of your camera.
Powering On/Off and Mode Selection
To power on, locate the clearly marked power button – typically on top of the camera – and press it firmly. The camera will initialize, displaying the shooting screen. To power off, repeat this process.
The mode dial allows selection of various shooting modes. Rotate it to choose Auto, Scene, or other desired settings. Understanding these modes is crucial for capturing the perfect shot in any situation.
Navigating the Menu System
Accessing the menu is typically done via a dedicated ‘Menu’ button. Use the directional pad or control dial to scroll through the various options, categorized for ease of use.
Settings include image quality, ISO sensitivity, white balance, and more. Confirm selections with the ‘OK’ or ‘Set’ button. Familiarize yourself with the menu structure to customize your camera for optimal performance and creative control.

Shooting Modes Explained
Nikon Coolpix cameras offer diverse shooting modes to suit various scenarios. Auto Mode simplifies photography, letting the camera handle settings automatically. Scene Modes, like Portrait, Landscape, and Sports, optimize settings for specific subjects.
Explore Night Portrait, Party, and Beach modes for tailored results. Understanding each mode empowers you to capture stunning images effortlessly, regardless of your photographic experience.

Auto Mode for Beginners
Auto Mode is the simplest way to start with your Nikon Coolpix. The camera intelligently analyzes the scene and automatically adjusts settings like exposure, focus, and white balance. This mode is perfect for everyday snapshots and beginners wanting hassle-free photography.
Simply point and shoot – the Coolpix handles the complexities, delivering consistently good results without requiring manual adjustments. It’s ideal for capturing spontaneous moments quickly and easily.
Scene Modes: Portrait, Landscape, Sports, etc.
Scene Modes optimize camera settings for specific shooting situations. Portrait mode softens backgrounds for flattering subject isolation. Landscape mode enhances colors and sharpness for expansive views. Sports mode prioritizes fast shutter speeds to freeze action.
Other modes like Night Portrait, Party, and Beach further tailor settings for optimal results. Experiment with these presets to achieve professional-looking photos effortlessly.
Focusing and Image Stabilization
Achieving sharp images relies on effective focusing and stabilization. The Coolpix offers Autofocus (AF) modes like Single AF for stationary subjects, Continuous AF for tracking movement, and Manual Focus for precise control.
Vibration Reduction (VR) technology minimizes blur caused by camera shake, especially in low light. Utilize VR for sharper handheld photos and videos, enhancing overall image quality and clarity.
Autofocus Modes: Single, Continuous, Manual
Single AF (AF-S) locks focus when the shutter button is half-pressed, ideal for still subjects. Continuous AF (AF-C) continuously adjusts focus while the button is held, perfect for moving objects.
Manual Focus (MF) grants complete control, allowing precise adjustments via the control dial. Experiment with each mode to determine the best option for your specific shooting scenario and desired results.
Utilizing Vibration Reduction (VR)
Vibration Reduction (VR) minimizes blur caused by camera shake, especially in low light or with zoom. Activate VR in the camera menu for sharper images and smoother videos.
Different Coolpix models offer varying VR modes; explore options like Normal, Active (for unsteady shooting), and Tripod (to disable VR when using a tripod). Proper VR usage significantly enhances image clarity and reduces noise.
Zoom and Image Composition
Mastering zoom and composition elevates your photography. Understand the difference between optical zoom – preserving image quality – and digital zoom, which can reduce clarity.
Employ the Rule of Thirds by imagining your frame divided into nine equal parts; position key elements along these lines or intersections for balanced, visually appealing shots. Careful composition draws the viewer’s eye and enhances storytelling.
Optical vs. Digital Zoom
Optical zoom utilizes the lens’s focal length to magnify the image, maintaining excellent quality and detail – it’s the preferred method for zooming. Digital zoom, conversely, crops and enlarges the image electronically, potentially resulting in a loss of clarity and increased pixelation.
Prioritize optical zoom whenever possible; digital zoom should be used sparingly when extra magnification is needed, understanding the potential trade-off in image quality.
Applying the Rule of Thirds
The Rule of Thirds is a fundamental composition guideline. Imagine dividing your frame into nine equal parts with two horizontal and two vertical lines. Position key elements along these lines or at their intersections.
This creates a more balanced and visually appealing image, drawing the viewer’s eye to the focal point. Experiment with off-center compositions to enhance your photographs and achieve professional-looking results.
Understanding Flash Settings
Nikon Coolpix flash settings offer versatile control over illumination. Auto mode intelligently determines when flash is needed, while Fill-Flash provides extra light even in bright conditions.

Red-Eye Reduction minimizes the red-eye effect in portraits. You can also manually adjust flash intensity for creative control, balancing light and shadow. Explore these options to enhance your images in various shooting scenarios.
Flash Modes: Auto, Fill-Flash, Red-Eye Reduction
Auto flash is ideal for general photography, letting the camera decide when to fire. Fill-Flash brightens subjects against strong backlights, eliminating shadows. Red-Eye Reduction emits a pre-flash to constrict pupils, minimizing the red-eye effect in portraits.
Experiment with each mode to achieve the desired lighting in different situations, ensuring well-lit and natural-looking photographs with your Nikon Coolpix.
Adjusting Flash Intensity
Fine-tune your flash power for creative control! Many Coolpix models allow you to adjust flash intensity, often with options like High, Normal, and Low. Higher intensity provides more light, suitable for distant subjects, while lower settings soften the light for closer shots.
Experimenting with these settings lets you balance flash with ambient light, achieving perfectly exposed and naturally lit images.
Reviewing and Deleting Images
Effortlessly manage your photos! Access Playback Mode to view captured images directly on the Coolpix’s screen. Utilize the zoom function for detailed inspection of clarity and composition. To delete unwanted photos, select the image and follow the on-screen prompts – typically involving a confirmation step.

Regularly reviewing and deleting frees up valuable memory card space.
Playback Mode and Zooming
Review your masterpieces! To enter Playback Mode, locate and press the designated playback button on your Nikon Coolpix. Once active, you can scroll through your captured images using the directional pad. Enhance your viewing experience by utilizing the zoom function; this allows for detailed inspection of focus and clarity.
Zoom in to confirm sharpness!
Deleting Unwanted Photos
Declutter your memory card! Within Playback Mode, select the image you wish to remove. Access the delete function, typically indicated by a trash can icon, through the camera’s menu system. A confirmation prompt will appear – carefully review before confirming deletion, as this action is usually irreversible.
Be certain before you permanently erase!

Connecting to a Computer
Transfer your memories! Utilize the provided USB cable to connect your Nikon Coolpix to your computer. Ensure your camera is powered on and select the ‘USB Connection’ option in the camera’s menu. Your computer should recognize the Coolpix as a removable drive, allowing easy access to your photos.
Simply drag and drop images for seamless transfer!
Using USB Connectivity
Seamless data transfer awaits! Connect your Nikon Coolpix to your computer using the supplied USB cable. Once connected, power on the camera and navigate to the USB connection settings within the camera’s menu system. Select ‘Mass Storage Device’ or ‘MTP’ mode for optimal compatibility.
Your computer will then recognize the camera as a drive, enabling effortless image transfer.
Transferring Images to Your PC/Mac
Effortlessly move your memories! After establishing a USB connection and selecting the appropriate mode (Mass Storage or MTP), locate the camera drive on your computer. Simply drag and drop your desired photos and videos from the camera’s folders to a designated location on your PC or Mac.
Alternatively, utilize Nikon’s Transfer software for organized importing.
Troubleshooting Common Issues
Don’t panic! If your Coolpix fails to power on, verify the battery is fully charged and correctly inserted. For image quality concerns, check the memory card’s capacity and ensure the lens is clean. If issues persist, reset the camera to factory defaults via the menu.
Consult Nikon’s support website for further assistance.
Camera Not Turning On
First steps: Ensure the battery is fully charged using the provided charger. Confirm it’s correctly inserted, aligning the contacts properly. Try a different, known-good battery if available. If still unresponsive, check the DC IN jack for any obstructions. A full reset, if possible, might resolve software glitches preventing startup.
Image Quality Problems
Addressing blurry photos: Verify sufficient light and utilize the Vibration Reduction (VR) feature. Check the focus mode – Single AF for static subjects, Continuous AF for moving ones. Ensure the lens is clean, free from smudges or dust. Experiment with different Scene Modes for optimal settings. Lower ISO settings generally produce cleaner images, minimizing noise.
Maintenance and Care
Preserving your Coolpix: Regularly clean the lens with a microfiber cloth, avoiding harsh chemicals. Gently wipe the camera body to remove dust and fingerprints. Store your Coolpix in a cool, dry place, ideally within a protective case. Remove the battery during prolonged storage to prevent potential leakage. Avoid extreme temperatures and humidity for optimal longevity.
Cleaning the Lens and Body
Gentle Cleaning is Key: Use a soft, lint-free microfiber cloth to gently wipe the lens surface, removing dust and smudges. For stubborn marks, breathe lightly on the lens to create condensation, then wipe. Avoid abrasive cleaners or excessive pressure. Clean the camera body with a slightly damp cloth, ensuring no liquid enters openings.
Proper Storage Techniques
Protect Your Investment: When not in use, store your Nikon Coolpix in a cool, dry place, away from direct sunlight and extreme temperatures. A camera bag offers excellent protection against dust, bumps, and scratches. Remove the battery for extended storage to prevent potential leakage or corrosion. Keep the lens cap securely attached to shield the lens.