
Picnic Table PDF Plans: A Comprehensive Guide
Discover a wealth of free picnic table plans in PDF format, ranging from simple 6-foot designs to elaborate covered tables with detached benches – perfect for any garden!
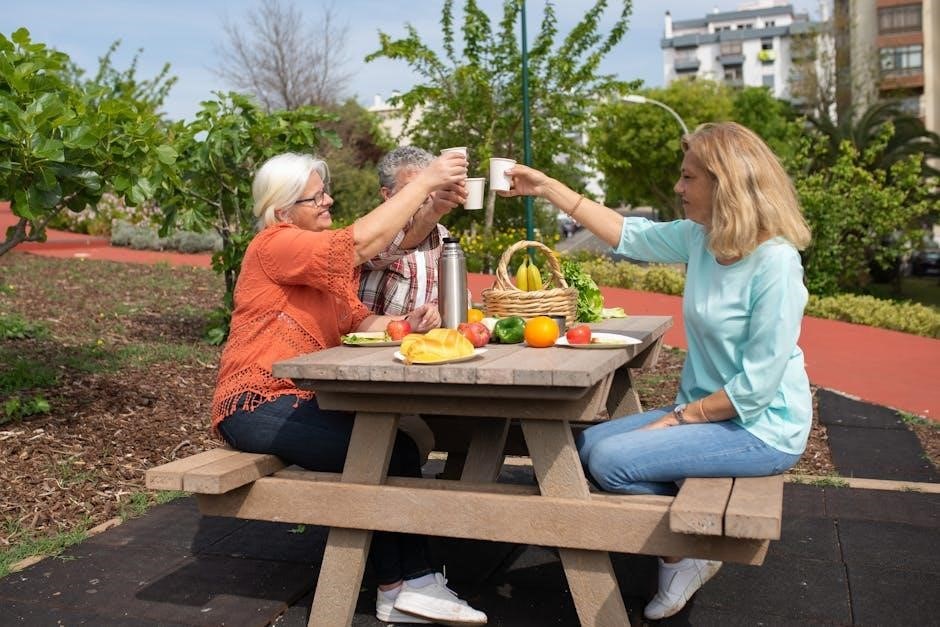
Embarking on a DIY picnic table project is a fantastic way to enhance your outdoor living space, providing a central gathering point for family and friends. Fortunately, numerous resources offer detailed picnic table plans in easily downloadable PDF format, simplifying the construction process. These plans cater to various skill levels, from beginner woodworkers to experienced builders.
Whether you envision a classic, straightforward design or a more elaborate structure with attached or detached benches, a covered roof, or even a built-in cooler, a suitable plan awaits. PDF plans provide clear diagrams, precise measurements, and comprehensive instructions, ensuring a successful build. Exploring options from sites like Home Stratosphere and Free Garden Plans unlocks a world of possibilities for creating the perfect picnic table for your needs.
Why Use PDF Plans for Picnic Table Construction?
Utilizing PDF plans for your picnic table build offers significant advantages. Firstly, they are readily printable, allowing for convenient access to instructions directly on-site, free from reliance on digital devices. Secondly, the detailed diagrams and measurements minimize errors, leading to a more accurate and structurally sound finished product.
PDF formats ensure consistent formatting across different devices, preventing display issues. Moreover, many plans are designed for print-friendly layouts, conserving paper and ink. Resources like Home Stratosphere and Free Garden Plans provide downloadable PDFs, streamlining the construction process. Ultimately, PDF plans empower builders of all levels to confidently tackle this rewarding DIY project.
Types of Picnic Table Plans Available
Explore diverse plans, including standard 6-foot, larger 8-foot, unique round designs, tables with attached or detached benches – find the perfect fit!
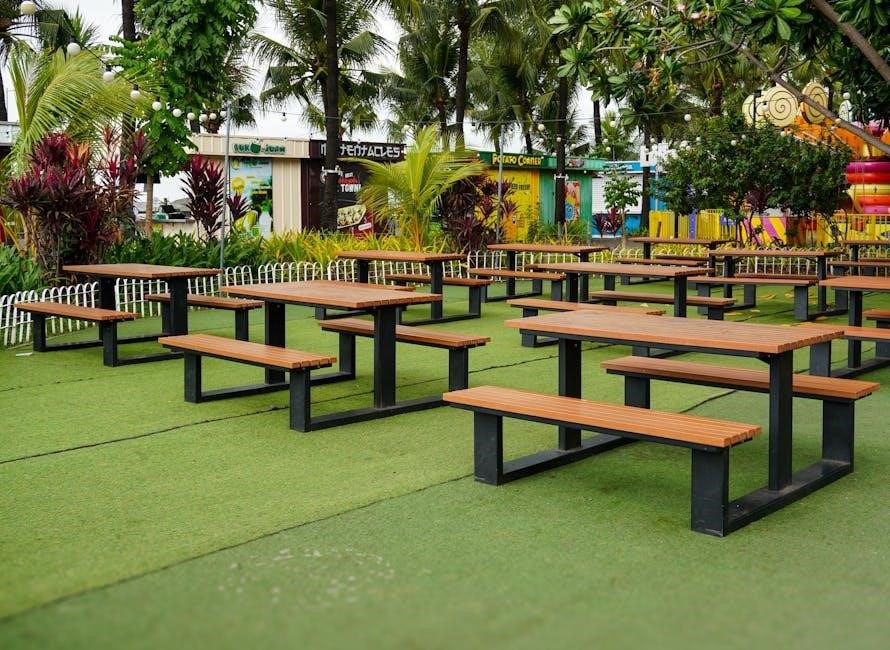
Standard 6-Foot Picnic Table Plans
These plans represent the most popular and readily available option for DIY picnic table builders. Home Stratosphere offers a particularly simple and straightforward 6-foot picnic table plan, ideal for beginners.
Typically, these plans utilize common lumber sizes, making material acquisition easier and more cost-effective. The design is universally recognized and fits seamlessly into most backyard settings.
The plans generally detail cutting lists, assembly instructions, and fastener requirements, often presented in a print-friendly PDF format for convenient use during construction. Expect clear diagrams illustrating each step, ensuring a smooth building process. This classic size comfortably accommodates 6-8 adults, making it perfect for family gatherings and casual outdoor dining.
8-Foot Picnic Table Plans for Larger Groups
For those frequently hosting larger gatherings, 8-foot picnic table plans provide ample seating and surface area. While less common than 6-foot models, readily available plans cater to this need.
These extended tables comfortably seat 8-10 adults, making them ideal for family reunions, parties, or accommodating larger households. Construction generally follows similar principles to the 6-foot version, but requires longer lumber and potentially additional support bracing.
Expect plans to include detailed cutting lists adjusted for the increased length, and reinforced frame designs to ensure stability. Searching online resources will reveal options with or without attached benches, allowing customization to suit your preferences and space constraints.
Round Picnic Table Plans: A Unique Option
Departing from the traditional rectangular design, round picnic tables offer a distinctive aesthetic and encourage more inclusive conversation. PDF plans for these tables are available, though they often present a slightly more complex build than standard models.
Construction typically involves creating a circular tabletop from individual wood slats, attached to a central pedestal base or multiple leg supports. These plans require precise cutting and angling to achieve a smooth, circular form.
Consider plans that detail the construction of a sturdy base, as stability is crucial for round tables. While potentially more challenging, the unique look and social benefits make a round picnic table a worthwhile project.
Picnic Tables with Attached Benches
Picnic tables featuring permanently attached benches represent a classic and space-saving design. PDF plans for these tables commonly showcase a robust frame supporting both the tabletop and integrated bench seating. Construction typically involves building a solid base and then attaching both the tabletop and bench structures directly to it.
These plans often emphasize strong joinery to ensure the benches remain securely fastened over time. Look for designs that detail proper bracing and support for the benches, preventing wobbling or instability.
Attached benches offer convenience, eliminating the need for separate seating, but may limit flexibility in arrangement.
Picnic Tables with Detached Benches
Picnic tables paired with detached benches offer greater flexibility in outdoor seating arrangements. PDF plans for these configurations typically detail the construction of a standalone table and separate bench units. This allows for easy repositioning of the benches, accommodating varying group sizes or changing garden layouts.
Designs often feature plans for building multiple benches, providing ample seating. The detached bench plans emphasize stability and comfortable seating dimensions. A covered 6-foot picnic table with detached benches is a popular choice, offering protection from the elements.
Detached benches are ideal for maximizing space and creating a more versatile outdoor dining area.

Essential Materials for Building a Picnic Table
Successfully building requires quality lumber, screws or nails, and essential tools – all detailed within your chosen PDF picnic table plan for a sturdy result!
Choosing the Right Wood (Pressure-Treated Lumber)
Selecting the appropriate wood is paramount for a durable, long-lasting picnic table. PDF plans frequently recommend pressure-treated lumber due to its resistance to rot, decay, and insect infestation – crucial for outdoor furniture. This treatment extends the lifespan of your table significantly, especially when exposed to the elements.
Consider the grade of pressure-treated lumber; higher grades offer better protection. While more expensive, they provide superior longevity. Pine is a common and affordable choice, but cedar and redwood are naturally weather-resistant alternatives, though pricier. Always check your PDF plan’s specific wood recommendations, as dimensions and quantities will vary based on the chosen material.
Ensure the wood is straight and free of large knots or cracks. Proper wood selection, guided by your PDF plan, will contribute to a stable and enjoyable picnic experience for years to come.
Fasteners: Screws vs. Nails
When constructing your picnic table, the choice between screws and nails is critical for structural integrity; While nails are faster to install, screws generally provide a stronger, more durable hold, especially important for a piece of furniture designed to withstand outdoor use and frequent movement.
PDF plans often recommend exterior-grade screws – coated to resist rust and corrosion. These are essential for preventing weakening of the joints over time. Consider using screws with a star drive (Torx) head, as they offer better grip and reduce stripping.
If opting for nails, choose galvanized or stainless steel to prevent rust. However, screws are almost always the superior choice for a robust, long-lasting picnic table, as detailed in most PDF guides.
Tools Required for Construction
Successfully building a picnic table, guided by PDF plans, requires a specific set of tools. A circular saw is essential for accurate lumber cuts, while a miter saw can simplify angled cuts. A power drill, with various bits, is crucial for pre-drilling and driving screws.
Essential hand tools include a tape measure, speed square, level, and a hammer (even if primarily using screws). Safety gear – safety glasses and work gloves – are non-negotiable.
Depending on the plan’s complexity, a sander will be needed for smoothing rough edges. Clamps are incredibly helpful for holding pieces together during assembly, ensuring squareness and stability, as many PDF guides suggest.
Step-by-Step Construction Guide (Based on Common Plans)
Follow PDF plans to first cut lumber to size, then assemble the frame, attach the tabletop, and finally build and secure the benches.
Cutting the Lumber to Size
Precise lumber cuts are fundamental to a sturdy picnic table. PDF plans will detail exact measurements for each piece – tabletop boards, leg supports, bench slats, and frame components. Utilize a circular saw or miter saw for straight, accurate cuts, ensuring safety with proper eye and ear protection.
Double-check each measurement against the plan before cutting, as errors here will compound later. Consider a cutting list to optimize lumber usage and minimize waste. Many plans specify the quantity of each lumber dimension needed. Accuracy is key; slightly off cuts can lead to instability or difficulty during assembly. Remember to account for the blade’s kerf (width of the cut) when measuring.
Assembling the Table Frame
With lumber cut to size, begin assembling the picnic table frame. PDF plans will illustrate how the legs, stretchers, and support pieces connect. Typically, this involves using screws – a more reliable fastener than nails for structural integrity. Pre-drilling pilot holes prevents wood splitting, especially with pressure-treated lumber.
Ensure squareness throughout the process; a slightly askew frame will result in an unstable table. Use clamps to hold pieces firmly together while fastening. Follow the plan’s sequence carefully, as the order of assembly often impacts stability. Regularly check for squareness using a carpenter’s square.
Attaching the Tabletop
Once the frame is robustly assembled, proceed to attach the tabletop. PDF plans detail the tabletop’s placement and fastening method; Typically, tabletop boards are secured to the frame using screws, ensuring they are countersunk to prevent snagging. Spacing between boards is often included in the plans for aesthetic appeal and to allow for wood expansion/contraction.
Prior to final fastening, verify the tabletop is centered and overhangs evenly on all sides. Use clamps to hold boards in place while screwing. Consider adding support cleats beneath the tabletop for increased strength, particularly for longer tables. Regularly check alignment during this process.
Building and Attaching the Benches
Following tabletop attachment, construct the benches according to your chosen PDF plan. Many plans offer options for attached or detached benches. Attached benches are directly screwed to the table frame, providing stability. Detached benches require separate assembly and are positioned around the table.
Bench construction usually involves creating a frame and then attaching seat boards. Ensure proper support and comfortable seating height as detailed in the plans. For detached benches, consider adding angled braces for stability. Securely fasten all components, and sand any rough edges for safety and comfort.

Free PDF Picnic Table Plans Resources
Explore readily available PDF plans from Home Stratosphere, Free Garden Plans, and a 50-plan collection, offering diverse designs for your outdoor space!
Home Stratosphere: Simple 6-Foot Table Plan
Home Stratosphere provides a remarkably straightforward, free picnic table plan ideal for beginners. This design focuses on simplicity, creating a classic 6-foot picnic table constructed primarily from wood. It’s the quintessential picnic table you’ll find in parks and backyards everywhere, making it a familiar and easily recognizable project.
The PDF plan meticulously details each step of the construction process, ensuring even novice woodworkers can successfully build a functional and attractive table. It’s a popular choice due to its ease of construction and minimal material requirements. Downloading this PDF provides a comprehensive guide, including material lists, cutting diagrams, and assembly instructions, all presented in a print-friendly format. This plan is a fantastic starting point for anyone looking to add a classic picnic table to their outdoor living area.
Free Garden Plans: Covered Picnic Table with Detached Benches
Free Garden Plans offers a beautifully designed, free picnic table plan featuring a practical covered structure and conveniently detached benches. This design elevates the traditional picnic table, providing shelter from the elements – making it an excellent choice even during rainy weather. The detached benches offer flexible seating arrangements and easy access.
The PDF plans are incredibly detailed, covering all aspects of construction from start to finish. Presented in a print-friendly format, the downloadable PDF file includes comprehensive instructions, material lists, and clear diagrams. This project is ideal for those seeking a more substantial and functional outdoor dining solution, offering both comfort and protection. It’s a fantastic addition to any garden or patio space.
50 Free DIY Picnic Table Plans Collection
Discover an extensive collection of 50 free DIY picnic table plans, offering a diverse range of styles and complexities to suit any skill level and aesthetic preference. This compilation serves as an invaluable resource for anyone looking to build a picnic table, providing ample inspiration and detailed guidance.
Each plan is readily downloadable, allowing you to quickly access instructions and begin your project. From classic designs to more unique and innovative creations, this collection ensures you’ll find the perfect table for your outdoor space. It’s a fantastic way to bring family and friends together, fostering memorable moments through a rewarding DIY experience.
Customization Options
Personalize your picnic table with stains, paint, or even an umbrella hole! Build a cooler table for ultimate convenience during outdoor gatherings.
Adding a Stain or Paint Finish
Enhance the aesthetic appeal and longevity of your newly constructed picnic table by applying a protective finish. Choosing between stain and paint depends on your desired look and level of protection. Stains penetrate the wood, highlighting its natural grain while offering moderate weather resistance.
Paint, conversely, provides a more opaque, vibrant color and a thicker protective layer against the elements. Proper surface preparation is crucial for both options; thoroughly sand the wood to create a smooth, receptive surface. Apply multiple thin coats, allowing each to dry completely before the next, ensuring even coverage and preventing drips.
Consider using exterior-grade stains or paints specifically formulated for outdoor use to withstand sun exposure, rain, and temperature fluctuations. Sealing the finished surface with a clear coat can further enhance its durability and resistance to wear and tear, keeping your picnic table looking beautiful for years to come.
Incorporating an Umbrella Hole
Enhance your picnic table’s functionality by integrating an umbrella hole, providing welcome shade during sunny days. Planning is key; determine the desired hole size based on your umbrella pole’s diameter – typically 1.5 to 2 inches. Carefully drill the hole through the tabletop before assembly, using a hole saw attachment for a clean, precise cut.
Reinforce the hole’s edges with a metal grommet or plastic ring to prevent cracking and ensure a snug fit for the umbrella pole. Consider the table’s structural integrity; avoid placing the hole too close to the edge.
Some plans may suggest adding a small wooden plug to fill the hole when an umbrella isn’t in use, maintaining the table’s surface and preventing debris accumulation. This simple addition significantly increases the table’s versatility and comfort.
Building a Cooler Table
Elevate your outdoor entertaining with a picnic table incorporating a built-in cooler! This design keeps beverages conveniently chilled, eliminating trips to the house. Plans typically involve creating a recessed space within the tabletop, sized to accommodate a standard cooler insert or a repurposed cooler.
Ensure proper drainage by drilling holes in the cooler compartment’s base. Consider insulation to maximize cooling efficiency, using foam or reflective material. A hinged lid provides easy access while maintaining temperature control.
Some designs feature a sliding lid for added convenience. Carefully measure and cut the opening, reinforcing the surrounding wood for stability. This feature transforms your picnic table into a self-serve beverage station!

Safety Considerations During Construction
Always prioritize safety by wearing protective gear – glasses, gloves, and a mask. Use power tools responsibly, following manufacturer guidelines for a secure build.
Wearing Protective Gear
Prioritizing personal safety is paramount when undertaking any woodworking project, especially building a picnic table. Before commencing construction, ensure you are equipped with appropriate protective gear. Safety glasses are crucial to shield your eyes from flying debris generated during cutting, sanding, and fastening processes. A dust mask or respirator will protect your lungs from harmful wood particles.
Robust work gloves are essential to safeguard your hands from splinters, abrasions, and potential impacts. Consider wearing hearing protection, particularly when operating loud power tools for extended periods. Appropriate footwear, such as closed-toe shoes or boots, provides stability and protects your feet from dropped materials or accidental injuries. Remember, investing in and consistently using protective gear is a small price to pay for preventing serious harm during your picnic table build.
Safe Use of Power Tools
Power tools are indispensable for efficient picnic table construction, but demand respect and careful operation. Always read and thoroughly understand the manufacturer’s instructions for each tool before use. Ensure the work area is well-lit, clean, and free of obstructions. Inspect tools for damage before each use, and never operate a faulty tool.
Secure the workpiece firmly before cutting or drilling to prevent movement and potential kickback. Maintain a firm grip and proper stance while operating power tools. Never reach over or around a running blade or bit. Disconnect power tools from the source when changing blades, bits, or making adjustments. Be mindful of power cords and avoid tripping hazards. Prioritize safety – a moment of carelessness can lead to serious injury.

Maintaining Your Picnic Table

Regular cleaning and weather protection, like staining, will extend your picnic table’s life; promptly repair any cracks or loose fasteners.
Cleaning and Weather Protection
To ensure longevity, regular cleaning is paramount for your picnic table. Dirt, grime, and food spills should be removed promptly using mild soap and water. Avoid abrasive cleaners that could damage the wood finish.
Weather protection is equally crucial, especially if constructed from wood. Applying a sealant, stain, or paint offers a barrier against moisture, UV rays, and general wear and tear. Reapplication may be necessary annually, or as needed, depending on the climate and product used.
Consider covering the table during harsh weather conditions or periods of non-use to minimize exposure and further protect it from the elements. This simple step can significantly extend the life of your outdoor furniture investment.
Repairing Common Issues
Over time, picnic tables may develop common issues like loose screws, wobbly legs, or splintered wood. Regularly inspect your table and tighten any loose fasteners. Replacing screws with slightly longer ones can provide a more secure hold.
For wobbly legs, ensure the ground is level or use shims to stabilize the table. Splintered wood can be sanded smooth and then resealed or painted. More significant damage, such as cracked boards, may require replacement.
Refer back to your original PDF plans for guidance on disassembly and reassembly if extensive repairs are needed. Addressing these issues promptly prevents further deterioration and maintains the table’s structural integrity.